Do you tend to take your young child at the age of four on a trip next week? Oh, that’s time to equip the best car seat for 4 year old kids. Do not worry since it will help you enjoy your relaxing time better without worrying about your naughty children.
And we will have an overview of this product to broaden your knowledge so that you can make a decision easily.
Let’s get started!
Purpose To Choose The Best Car Seat For 4 Year Old
Why should we buy a car seat for your child instead of using the chair of your car? It is worth mentioning that it’s for 4 year old children. They are playful, naughty, sometimes active, so looking after them is not easy, especially keeping them quiet during a long trip.
For this reason, it is essential to equip a suitable car seat for these children. Also, if the car stops suddenly, this car seat will become safety equipment.
Moreover, the traditional car seats are quite hard, and seats are close together like a long couch. Your child can find all ways to pass through the seat belt.
But a specific car seat will be on another level, which keeps everything under control. These kids are able to play, contemplate the scene, or do anything they want while sitting on these devices.
Features Of A Car Seat For 4 Year Old Children
1. Fit Your Car’s Size And Your Child’s Body
First, let’s consider your car size to determine whether it is suitable for which model?
Then, it has to fit your children’s body, you can observe to see whether they feel comfortable or not. When you go to the mall, take your child to try it actually!
2. Make Your Child Comfortable
Second, you might think about the possibility of keeping your children while they are playing or fall asleep.
Third, we expect a comfortable seat, and then it will be best if we care about the material, right? It should be covered by cushions. The belt locks must be made of plastic instead of metal. As such, we will have a feeling that it’s soft and comfortable.
3. Quality
Next, quality is the standard that most people are interested in. If it is durable enough, the buyers believe more, and it will surely be popular. We should have a product that goes with us in a few years.
No one wants to own a short-term product, right? That’s so wasteful. When your child is grown, it can become a present for your relatives or friends. Or it is fine if you can keep it to welcome a new member of your family in the future.
4. Cost
But how to choose the best one? People say: “You get what you pay for.” Therefore, it’s better to buy a thing that should be a bit costly. However, there is no need to buy an expensive one. Let’s pick up the product that perfectly suits your option and budget.
5. Other Features
In addition, you can consider other features, such as its ease of clean to provide more convenience during use. Moreover, you will have more options if these car seats come to the market in various different colors.
This is the first time you buy a car seat for 4 year old children. How to choose a good product? Why don’t we ask your friends first? They are experienced buyers that can get a lot of helpful advice from them.
Or you can search on the Internet and of course, there are hundreds of options. Let’s consider them by reading the reviews. But if its variety confuses you, we recommend you to ask your friends afterward.
On top of that, you can reference some brands like Chicco, Graco, Britax, so on. Deciding the brands first will help you have clear ideas.
Some Recommendations
On Amazon’s website, we give you some product models which are rated 5 stars for reference. They will be useful for your choice.
With our buying guide, now you can know more about the best car seat for 4 year old children, and we are sure that you can collect some tips to choose a suitable one.
Let’s consider your budget, your child’s age, also your car’s size, and you will have your own choice. And don’t forget that safety is a must to pay attention to so that you feel secure about your child. We hope our writing will help you a lot.
You might have a dog that loves traveling with you. But, he is an active little puppy and he loves running around in the car. You can’t even open a window, because you are afraid that he will jump out. Does this sound familiar.
The good news is that you can still enjoy your dog with you in the car, without him getting injured or without you getting distracted while you are driving. You should just buy the best dog car harness. Then your dog can enjoy his car rides, without running around in the car.
But, before you are buying the harness, there is some essential information that you need to know.
What Is a Dog Car Harness?
A dog car harness is a harness that your dog wears in the car. It’s connecting to the car’s seatbelt and will keep the dog in an upright position, but will prevent them from running around.
The harness is similar to the harnesses that your dog will wear when you are taking him for a walk. The only difference is that you are connecting the harness to the safety belt in the car.
There are two major reasons why these dog car harnesses are so important. The first reason is for the protection of the dog. A dog that is running around in a car can be dangerous. Especially if you are riding with your windows open. The dog might jump out and hurt himself seriously on the road. This is if a car doesn’t run him over. And, during an accident, the dog will be just as safe as you, if you are wearing your seatbelt.
The second reason is it is safer for you as well. A dog that isn’t calm and sitting still in a car is distracting the driver of the vehicle. This can let you concentrate on the dog instead of the road where you drive. Leading to an accident. Just remember that to have a harness that is working correctly, it needs to be the right, high-quality harness.
Buying Guide for These Dog Car Harnesses
When you are buying a dog car harness,
there are a couple of things that you need to consider. Things that will ensure
that you are buying the best car harness for dogs that will protect you and
your dog.
The first thing that you need to make sure
about, is the size of the harness. It needs to fit perfectly on your dog. It
should never be a tight fit because they need to breathe easily. And, if the
harness is too large, they can get out of the harness without any problems.
The material that the harness is made of,
is just as important. It needs to be durable so that the dog can’t break the
harness, but it needs to be comfortable as well. Washable is preferable and
needs to be double stitch so that it can last a very long time. Especially for
the larger dogs.
The last thing that you should look for is
that the harness is designed for car use only. Don’t use the harness that you
already have at home. The car harness is designed for car use and is ensuring
that the pet isn’t injured during an accident.
The Best Dog Car Harnesses on the Market
The good news is that there are a couple of
dog harnesses on the market that you can choose from. However, you need to know
which ones are the best to buy, and which ones are just cheap, unsafe ones that
you can buy. These are the best dog car harnesses on the market at the moment.
Harnesses that are designed for car use and that ensure that safety comes
first.
Kurgo Dog Harness Car Seat Belt
Top Paw Mesh Dog Harness
Blueberry Pet Dog Harness And
Seatbelt
PetSafe Solvit Deluxe Car
Safety Dog Harness
Good2Go Black No Pull Dog
Harness
Things to Consider When Buying a Car Harness for Your Dog
There are things that you should consider
that are essential before you just go and buy a car harness for your dog. One
of these things is that you need to consider the quality of the material. Even
if the material needs to be durable, it needs to be breathable as well. To
ensure that your dog is comfortable during the ride as well.
Buying a dog car harness is a good idea if you like traveling with your dog a lot. This is just making this safer for you and your dog. When you are following this guide, you will know for sure that you are buying the best harness for your dog. To make sure that he is still comfortable, even if he is harnessed to the car seat.
Nowadays, more and more people prefer having their weekends smoking and grilling food at home with their loved ones to going out. With that mindset, the smoker has been on the list of best selling products.
In this article, we will go further on the basic features of the Propane Smoker from Masterbuilt, a leading designer and manufacturer from the USA, then I will introduce you on how to smoke with a Masterbuilt Propane Smoker and some useful tips.
Why Should You Choose a Masterbuilt Propane Smoker?
Masterbuilt is a leading manufacturer in cooking appliances based in the USA. During its 45 years of development, Masterbuilt has become well-known for its high-quality grillers, fryers, smokers, consumables, etc.
With a variety of smokers in different designs and features, you can easily choose which model is the best for your needs.
After 45 years of experience, Masterbuilt understands what makes a cooking appliance useful. They have created many series targeting different groups of users, and help the brand gain trust and favour from their customers.
The Propane Smoker from Masterbuilt is voted as one of the best smokers recently. Some of its famous models like MPS 340/G ThermoTemp XL, MPS 20B Patio – 2 – Portable, 20051311 GS30D 2-Door, etc. all receives positive feedback from customers.
Masterbuilt Propane Smoker is convenient, high-quality, reliable, affordable and efficient. In the below section, we will go into detail of how to smoke with a Masterbuilt Propane Smoker.
How to smoke with a Masterbuilt Propane Smoker
Install the Propane Tank
Traditionally, outside smoking is conducted with a charcoal smoker. In order to smoke food, we have to burn coals and add wood chunks later to strengthen the flame. This process is time-consuming and not environmental-friendly.
However, since more and more people are becoming environmentally-conscious, another alternative is to use propane.
The first step before smoking is to connect the propane tank with the valve. It is a must to ensure the connection between the valve, and the tank is tight enough not to leak any gas outside. Then, release the propane from the tank to the pipe.
Run the smoker
After tightening the connection between the valve and the tank, you can switch on the smoker and set to the desired temperature. The chimneys and the vents should be opened and the door needs to be closed.
Prepare the wood chips
Wood chips are not the primary element of the smoking, but the result will be wonderful if you add the right wood chips to the smoker.
You can choose the flavour of wood chips based on your preferences. Then, soak it in water for 30 minutes. It is said that the soaked wood chips could smell far better when put into smoking!
Prepare the Water Tray
The water tray is used to maintain the temperature inside the smoker. In case the heat is too high, the water tray can decrease the temperature, which will reduce the chance of overheating.
Besides, the steam emitted from hot water will keep the heat at the proper level, so the cooking speed can remain stable.
Add the food
Once the inside temperature is reached, you can put the food into the smoker. To be specific, the ideal temperature for cooking poultry is from 70 to 75 Celsius degree; for pork and beef is 60 to 70 Celsius degree and for fish with fins is about 65 Celsius degree.
Besides, you should smoke your dish with veggies to add some extra flavors to the food.
Check the food and the inside temperature regularly
While smoking meat, it is necessary to check the food regularly. It’s difficult to strictly follow the status inside the smoker, so you should check the inside temperature regularly by using the thermometer to avoid burning or any fire incidents.
Additionally, there could be some circumstances such as the machine automatically turns off, or the flame is not strong enough, etc. Thus, don’t forget to check the smoker carefully and periodically.
After the smoking is finished, you can remove the food out with safety gloves on. But, right after the machine is turned off, the temperature is still high that it can burn your hands.
Thus, it is recommended to pay attention to the temperature of the smoker as well as put safety gloves on while working with the device.
Turn off the smoker and clean up
After smoking the meat, it’s time to switch off the machine. But be aware that you have to turn off the fire first, then close the valve to stop the gas from releasing out.
Finally, disconnect the propane tank from the smoker. It is a must to disconnect the gas release because it can be risky if the gas is leaked outside.
Cleaning up the smoker is also important. You have to wait for the machine to cool down, then remove trays and racks, brush them with soap carefully. Ashes during the smoking process may stick between racks, so you should remember to remove it, too.
Tips on using the Masterbuilt Propane Smoker
Keep the smoker clean
After each smoking session, experts advise you to clean your machine thoroughly. Firstly, a clean and spotless smoker always creates a safer and more comfortable feeling when using. Who doesn’t prefer a new and modern device, right?
Secondly, if you don’t clean up your smoker attentively, there could be ash, or grease remaining on racks and trays.
In the long term, this will contribute to the efficiency of the smoker because even little charred food waste can be stuck between the pipe or any other components of the machine.
Smoke at the appropriate temperature
Gas smokers like propane smokers can be used to smoke at a lower temperature compared to a charcoal grill. So, when cooking a dish that requires strong heat, people have to grill the meat under the gas smoker for a longer time.
It really takes time to calculate and figure out the exact formula for a tasty recipe, and it is even more difficult with this kind of smoker. So you need to research the proper time and temperature for your desired dish. Use a thermometer in hand to confirm the degree then.
Try different kinds of woods
You can use any kind of wood to smoke, but there are some great combinations of food and woods that you must know to make a tasty dish.
For example, if fish is smoked with alder, oak, mesquite, or veggies are cooked with hickory, pecan or maple, the dish could be far more delicious. Thus, before cooking, you can search for which woods make the tasty food with your material to prepare, or, you can create your custom blend.
Conclusion
Briefly, Masterbuilt Propane Smoker is highly recommended because of its efficiency and convenience.
Personally, if I am about to buy a smoker that is affordable, easy to use and high-quality, this product will be my first choice. The above article has shown you How To Smoke With A Masterbuilt Propane Smoker.
It’s somewhat surprising to see the term “best entry smoker” keeps popping up in your search history recently. We mean, summer is in town, bringing with it the instant associations of nightless parties, huge pool feastings, and arbitrary road trips that you never missed out on, even one.
But now, whether it is the ubiquitous impact of coronavirus, your mother’s words, or simply your choice, you have decided to check your attendance at family gatherings, which is a good sign.
And trust us, you’ll want to wrap your mind around how to handle the barbecue smoker, so that your cousins will be blown away by your resourcefulness, and your mother won’t ever rant with her sisters that “Boys will always be boys.”
Now, grab your notebook, and go all the way from the basics.
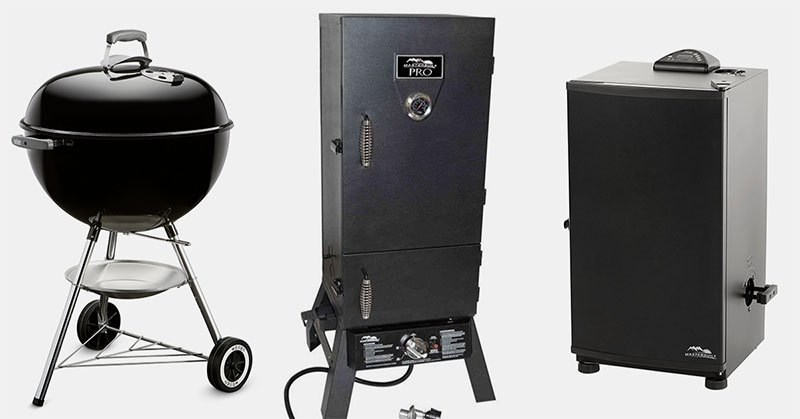
Just like how its name suggests, this Masterbuilt smoker might initially strike you as quite a lofty-built beast. But the sole fact that it’s lofty has not done the smoker enough justice without mentioning the beginner-friendly aspects.
First off, you’d be blown away with how easy the assembling is, even as a novice. Saying that you can use the smoker right out of the box is not even an understatement.
Next up, throughout the grilling process, you can save yourself the hassle of chopping wood chips into small pieces, opening the hot smoker door, and then inserting the chips. Simply by using the wood chip loading system, it’s all done in a blink.
Another feature that makes this smoker so incredibly favored by beginners is that it has the thermostat control, which allows you to adjust the temperature and time to be consistent and most perfect for your taste, only with a button. Isn’t it lovely?
Moreover, the big size allows for more generous capacity, making it extremely suitable for huge feasting parties whereby you can grill food on four different levels.
However, make sure that you have run through the user manual carefully before diving in because some smokers can involve major faults in the insulation system.
Pros
Effortless assemblage
Retains heat very well
Allows food to be adjusted to the most spectacular taste
Can be used without batteries
Can cook a lot of foods in one sitting
Cons
Might involve major technical problems in the insulation system
Verdict: To reiterate, if you’re a complete novice who is looking for a robust and no-hassle smoker, look nowhere else, this is it.
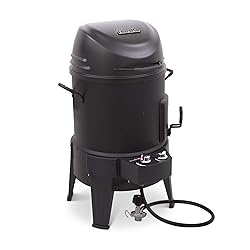
Mindful that you’re quite overwhelmed with the last Masterbuilt smoker, we now proudly present you this streamline Char-Broil smoker/ grill.
The best thing about this Char-Broil buddy, we believe, is its outstanding versatility. We mean, whatever cooking process you’re aiming at, say, smoking, roasting or grilling, this buddy’s got you covered. Even well covered.
The TRU-Infrared technology can prove our last point. It allows the smoker to spread the temperature to the food all over an increased surface area, from the bottom to the top, left to right. Moreover, food can’t slide down the grates. And then, before you treat yourself to the feast, you’ll feast your eyes on the juicy, evenly grilled results already.
One side tip here for you, this Char-Broil can be used alongside with a smoker box to boost the smoky flavors of the dish.
Last but not least, its comparative space can fit up to a 21 lb turkey. Quite a competitive candidate with the previous one, isn’t it?
Pros
Utilised for different purposes
Easy to use
Used along with a smoker box for increased flavor
Convenient carrying handles
Made from high-quality materials
No flare-ups when cooking
Cons
The drip tray doesn’t really fit
May not last long
Verdict: If you are a big fan of family gatherings and barbecue parties, don’t hesitate to seize this smoker right away. It’ll serve you well with different purposes without getting you bored with the bland foods.
Struck at a price nearly double the Char-Broil, you are wondering what is it that makes this Bradley so highly valued, aren’t you?
It actually stands to reason. Bradley has always been known as a world-class brand whose products are geared towards perfection, reliability, and durability. This product is no exception. It’s constructed with the powder epoxy steel on the outside and nicely polished with stainless steel for the interior, which is very easy to clean up.
We mean, certainly, no one likes to tackle the after-party. But when compared to other counterparts that involve such painstaking wiping on the bucket, grease trap, and things like that, Bradley undoubtedly overshadows them all with its easily removable parts. It’s like a mess-free cleanup. You’ll see.
Also, this product can totally keep up with your party duration, say, 8 hours? As if. Keep your smoker controlled and it’ll function well enough all day. Yes, you read it right.
Speaking on the long-term level, if maintained properly, the smoker can last up to a decade. Does that excite you yet?
Pros
Quick and easy assembly
Has 4 separate racks for different food categories
Easy to clean up
Gives off no ash, just pure smoke
Works up to 9 hours of wood smoking in the hopper
Cons
Rather pricey
Verdict: Seriously, this is worth money. If you have some money to splurge, go straight to this Bradley buddy and see everything we just said for yourself.
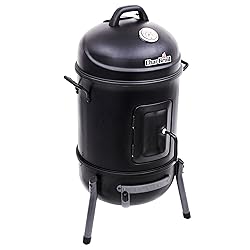
Another smoker from Char-Broil, but this one has a more simplified design and is smaller-built. Thus, it’s also much affordable for someone who’s on a budget.
To be honest, this Char-Broil smoker is nowhere near as competitive as the Bradley equivalent, yet gives you a decent impressive performance.
With a 544-square-inch of working space, in combination with a large wood chip box that is constructed out of high-quality materials, you’ll find yourself enjoying the barbecue party atmosphere for hours on end. No need for a constant check-up on chips. How nice it is!
Apart from that, the smoker is also nicely secured with two handles and latches on the sides, allowing you to imagine yourself rotating a vault.
Provided at this lesser cost, the performance isn’t as outstanding in terms of smoking capability and flavoring. But for an occasional smoker, this can do just right.
Pros
Has a large wood chip box for less refilling
Offers spacious cooking area
Extremely affordable
Has a detailed user manual
Cons
The analog doesn’t reflect the right internal temperature with large loads of meat
Verdict: If you’re either not so fussy over barbecue quality, or you’re an occasional smoker, this one is not a bad idea.
If this is a competition of aesthetics, this bullet-looking charcoal smoker will undoubtedly be the grand beauty pageant. But even if it’s not a beauty contest, the Char-Broil bullet smoker still wins scores over its excellent ability to control the inner airflow.
This innovative technology works so outstandingly thanks to two factors, namely the long-lasting porcelain-coated steel body, and the simplified settings to maintain internal temperatures. There’s also a temperature gauge located just above the smoker lid, whereby you can keep track of what’s going on inside.
Plus, its side door space is ample enough to accommodate additional fuel, enabling you to maintain the desired constant temperature over a long period. It’s exactly how you have the distinctive charcoal-ish taste. Feel free to enjoy your friend’s/ family’s complements.
Pros
Features an innovative airflow control technology
Lightweight
The porcelain material allows for long-term durability
Pretty accurate thermometer on the lid
Large ash pan
Extremely affordable
Cons
Not well insulated
Smoke leaks
Verdict: If you value the smoker’s physical appearance and lasting durability above all, no other equivalents can beat this buddy, we believe.
What To Consider When Buying A Smoker For Beginners
Before making your buying decision, sketch out these headings:
Determining your budget
This will undoubtedly save you from buying impulses. After all, a smoker/ grill is just a cooking buddy, no need for splurging a ton on brands, models, or sizing. Unless you want a backyard ornament.
Going for a competent and durable smoker is just right.
Understanding fuel types
Bear in mind that many smokers emit smoke (obviously) that is disruptive to people with asthma. From that, decide which you’ll go for, either charcoal, gas, or whatnot.
What is your cooker buddy used for?
Whether it’s a multi-purpose smoker or a grill is also a matter for consideration. Think it over or you may have to buy another smoker for a single purpose.
How large your squad is
The size of your squad may affect the amount of food put in the smoker, and thus affect the size of the smoker that you’re intending to buy. So, make sure you have grasped it well on hand.
And that’s a wrap. We believe that with our concise buying guide on the best entry-level smoker, you have made your own decision.
Personally speaking, we’d prefer the Char-Broil TRU-Infrared smoker & grill as the top choice, for its multi-purpose application, high-quality materials, and great ability to smoke food without flare-ups.
Now, tell us what’s on your mind by commenting down below!
Do you want the best dart board cabinet to keep your playing area well-organized? We guess the answer is definitely yes, right?
In fact, now there are so many choices, designs, and models to refer to. That’s why you are often confused by this variety and don’t know what to choose. However, we assure you that the following buying guide will help you out!
Things Need Considering To Choose The Best Dart Board Cabinet
To help you pick your desired cabinet, we carefully list 4 factors below to take into account. With our guides, you can opt for the very best!
Dartboard Types
Prior to buying the cabinet, we recommend you choose the dartboard type first. You must know which type will match your playing style and ability. Particularly, there are three following dartboard types:
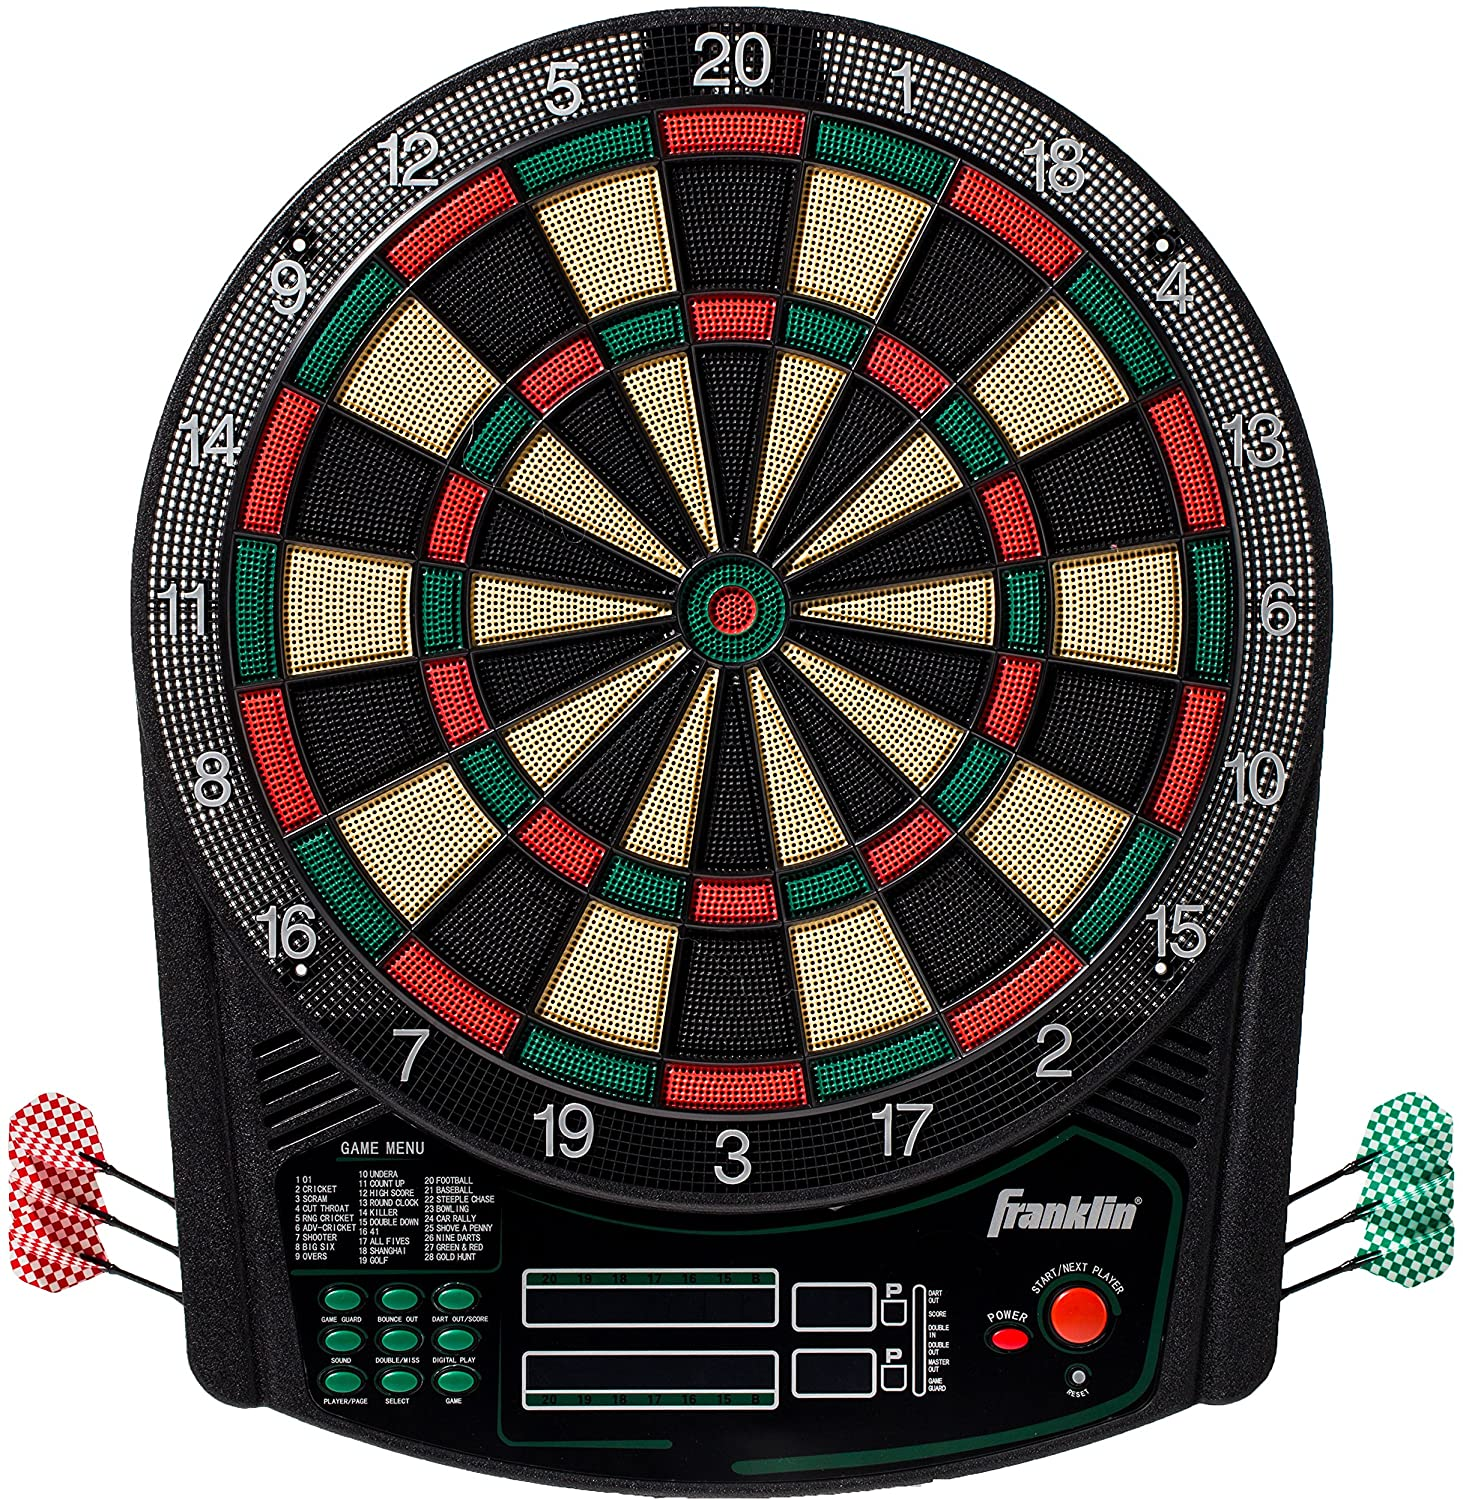
Electronic Dartboard
This model is a good option for both darts amateurs and beginners. It’s often made from plastic, including plastic-tip dart. If you are about giving a dartboard to your kids, you can opt for this plastic type. The main reason is that it’s so child-friendly and lightweight that your children can play safely.
Bristle Dartboard
Skilled dart players and professionals are the people who frequently used this type. Because of being made from sisal fiber with self-healing ability, this cabinet can be easily back to its original state. But this bristle type isn’t suitable for children as the dart is steel-tipped which can damage the wall and hurt them.
Magnetic Dartboard
This is a combination of electronic and bristle dartboards. A magnetic dartboard will offer you real experiences in many secure, kid-friendly dart playings. Certainly, your children will have more fun since they’ll need to perform their hand-eye coordination and math skills. Also, this bristle dartboard is cheaper than other types. An amazing choice, isn’t it?
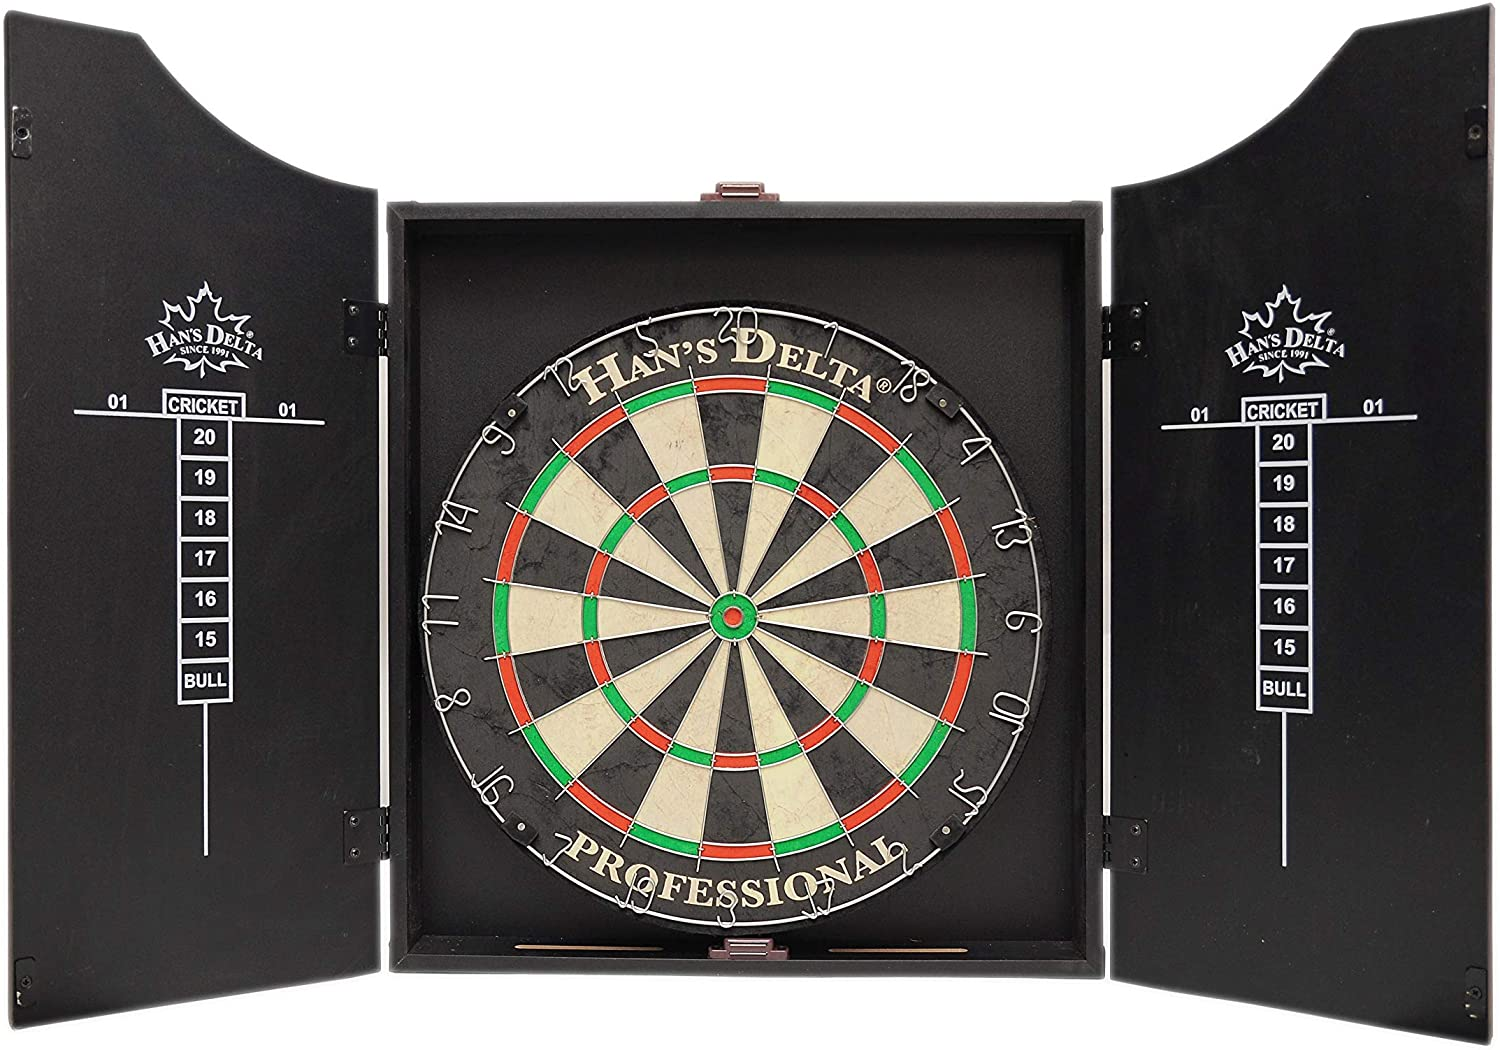
Material
The best dart board cabinet is required to be made from durable materials. You shouldn’t pick a cheap cabinet made from plywood since it can be broken easily. On the contrary, solid wood cabinets would preserve your board and darts better for years.
If you require a strong wood cabinet, it must have been polished assiduously and sanded smoothly. We suggest you can opt for lovely rustic cabinets which are built from reclaimed wood. Plus, many woods owning a polymer coating will save the cabinet from high moisture and exposure. You can refer to them!
Moreover, several electronic dartboards are the best bet for traditional style people. These models tend to follow classic appearances along with a large place to keep your soft tip darts.
Finally, steel or carbon fiber cabinets are also suitable for you if you want a modern look. Even though most people feel that these cabinets are less attractive than traditional wooden others, these last models are worth a try!
Cabinet Size
One thing you should do before buying a dartboard cabinet is to measure the length and width of your wall and scrutinize your dartboard’s size accordingly. Once you’ve finished this step, you can pick a cabinet with smaller or the same size to the size of your wall.
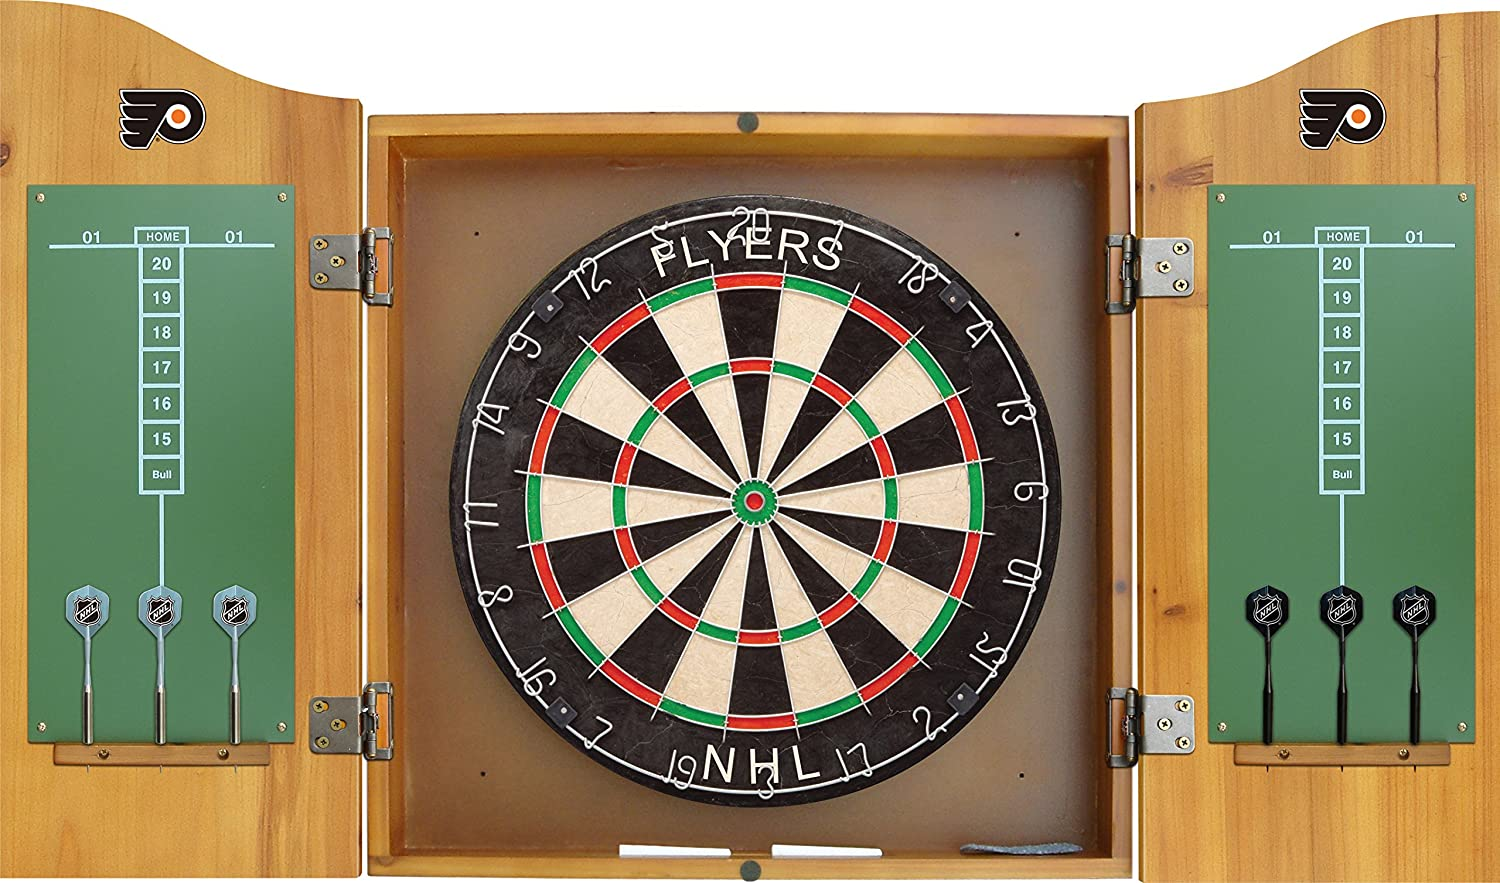
Scoreboard
It’s undeniable that a scoreboard could promote the efficiency of your dart game. Most cabinets go with scoreboards which are usually seen behind two doors of the cabinet to support your performance better.
When searching for the most ideal cabinet, you should care about the scoreboard type. Overall, scoreboards come in three patterns: electric boards, blackboards, and whiteboards. Sincerely, you should opt for a cabinet with whiteboard pens/chalks for the scoreboard to avoid extra expenses.
The cabinet gives some different extra storages depending on its style. You could save your darts, flights, or tips when you have a safe place in the cabinet. Obviously, extra storage gives you somewhere to keep your board and items in reserve. For us, the cabin doors are the best option to hang your scoreboards so that you needn’t dismount them many times.
Protection
At times, your darts can be lost or strayed during your game matches. At such times, a cabinet is a solution because its doors open outwards and offer more safety from missed darts.
Besides, a dartboard cabinet is able to protect your darts from serious damage. While your harsh walls will easily have several ugly holes if they collide with sharp darts, a cabinet with a wood/plies backing won’t destroy your walls. Thus, a dartboard cabinet is an indispensable tool for dart games.
Overall, a dartboard cabinet is proven to be part and parcel in your dart games. Therefore, purchasing the best dart board cabinet to support your performance is crucial, too. Now this kind of purchase will no longer trouble you thanks to our detailed buying guide on the above.
What are you waiting for? Reward yourself with the desired dartboard cabinet right now!
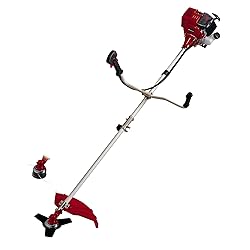
Gas weed eaters. There are some good things about it and some negative things that you need to know. However, in general, many people prefer gas weed eater over the electrical or battery weed eater.
When you are purchasing your very first weed eater, you might be worried that you are going to buy something that is cheap and that won’t last as long as what you hoped for. This is why this buying guide is so important. It makes sure that you know what to look for when you are buying a weed eater that is worth the money you spend on it.
What is Making the Gas Weed Eater Great?
Why are people considering buying the gas weed eater instead of the other two options? The main reason is that the gas weed eater is cordless. You can take it anywhere and use it even where there is no electricity. All that you need is the gas to refill the weed eater when the tank is empty.
The gas weed eater is stronger than any other weed eater on the market. It will cut grass and weed a lot easier than with any other weed eater.
Negative Things About the Gas Weed Eater That You Need to Know
Even if there are so many positive things about the gas weed eater that is making people buying them, there are a couple of negative things that you need to know as well. This is to make sure that you choose the right weed eater for you.
First of all, gas weed eaters are quite heavy to use. You will need to be strong to use the weed eater for hours on end. This is because of the gas tank that is added to the weed eater. The noise can be unbearable when you are using the gas weed eater.
Especially those weed eaters that have stronger and larger engines. The fumes of the weed eater aren’t eco-friendly and can be dangerous for your health in the long run.
Features to Consider When Purchasing a Gas Weed Eater
When you are buying your gas weed eater, there are a couple of features that you need to make sure about. This is to ensure that you are going to buy one that is giving you value for money. One that you can use and know that you have the best one you could find. These are some of the essential features of a gas weed eater to consider.
The size of the engine. The larger the engine the stronger the weed eater will be. However, the heavier it will be to use.
The cutting width. The larger the cutting width, the less time you will need to cut the grass. It will cut a larger piece of grass with one cut.
The material that the weed eater is made of. The higher the quality of the material, the better the quality of the weed eater will be. The longer lasting the weed eater will be.
The type of string that the weed eater is using. Some weed eaters can use different thickness strings. While others can only use one thickness. It is important to make sure that you consider the one that can use different thicknesses string.
Buying Guide to Ensure You Purchase the Best Weed Eater
With this buying guide, you will know for sure that you are buying the best weed eater on the market and one that you can afford.
You need to consider the budget that you have for purchasing the weed eater. You should consider the price of the weed eater, the size and the weight that you can handle. You need to make sure that the weed eater is easy to assemble and to use.
The Best Gas Weed Eater That You Can Purchase
The moment that you know some of the best gas weed eaters that you can purchase, the easier it will be to choose the right one for you. One that will give you value for money and great working experience. These are some of the best gas weed eaters that you can purchase today.
Husqvarna 128LD
Troy-Bilt TB42 BC
Weed Eater W25CBK
Hitachi CG23ECPSL
There are a couple of good and bad things about the gas weed eaters. However, if you are looking for something that you can use, even if there is no electricity out there, then the gas weed eater is the one to consider. All that you will need is gas.
There are a couple of features that you need to consider, and you need to make sure that you know your budget and how much weight you can handle. Because some of these gas weed eaters can be heavy. Now, you will not make a mistake in purchasing a weed eater that you will not be using.
When it comes to trimmer lines, things can be foggy. Even the sellers cannot differentiate between the trimmer lines’ size and understand the difference among them. Well, we are here to sort out one of the most-used trimmer lines’ types as we offer you the best 0.80 trimmer line ranking!
In this article, we will present five best .080 trimmer lines available on the market, along with the buying guide on how to purchase your ideal string trimmer line—excited enough? Then keep reading, and we will be your guide!
If you need to remove the weed stumbling all-around in your backyard on occasion only, a light-duty trimmer line will be the most beneficial solution you can get. DeWALT’s trimmer line will suit whose garden is currently suffering from weed issues in a particular time frame. Or else, if you already had your garden prepared by a gardener, a made-for-light-duty trimmer like this will suit your needs.
This trimmer is strong and durable in texture due to its well-made flexible, impact-resistant material. However, in contrast to how it feels, the line is extremely thin, preferable for gardening jobs requiring delicacy. With the measurement of 0.08 inches in diameter, this is the perfect line size for light-duty gardening tasks such as grass-cleaning or brush-sweeping.
The lightweight yet durable material of this trimmer line makes its lifespan even longer than ever. You don’t have to worry much about this issue when repurchasing this tool. Moreover, its cutting efficiency is still maintained from the first moment you use it all the way to end. You will see your grasses, brushes being cut with ease.
The one thing that we don’t fancy about this trimmer line from Dewalt is that, compared to other trimmer lines and other products from Dewalt, this product is not indeed their best performance. There have been complaints about this line’s durability and flexibility when it comes to working with weedeaters. Hence, if your gardening is in severe condition and requires special care, consider this trimmer line before purchasing it.
Pros
Best for lightweight duty
Robust twisted formula trimmer line
High trimming efficiency
Cons
Anti-heavy-duty
Verdict: Overall, DeWALT DWO1DT802 is a good trimmer line thanks to its stably-well performance along with its flexibility.
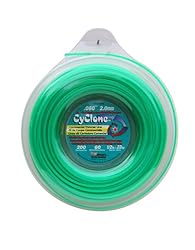
Are you looking for a string trimmer line that can be super everlasting? Well, this trimmer line from Cyclone deserves to be put in your shopping cart right now because of its lifetime durability.
It can be used for more than five years without performing off the track. No matter how much grass or brush you have it sliced through, it will still function freshly-new like day one.
Wonder how this trimmer line can perform so outstandingly in such a long time? Well, its copolymer formulation plays the most critical role in providing longer and lasting commercial cutting. Six additional blades vary in different shapes so that the cutting power can be divided evenly between your landscaping section.
In case you have a careful plan on landscaping, this trimmer can help solve your problems in a blink of an eye, thanks to its powerful cutting energy. Weeds are 1/2″ to 1″ in diameter can be eaten right through this trimmer line without hesitation. Only one single spool for a neat yard, are you excited enough?
However, this trimmer will still be prone to breakdown if you stumble it on rocks or cement, so be careful with the weed eater that has this line on.
Pros
Best long-lasting trimmer line
High cutting efficiency
Cons
Must be used with caution
Verdict: Cyclone CY080D1/2-12 act as a durable trimmer line that can satisfy any customer. Moreover, it is also compatible with any weed eater. We believe that this “buddy” will not let you down.
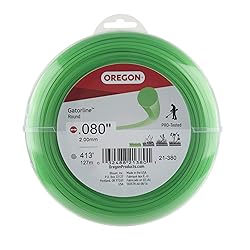
If you are broke but still want to own a decent trimmer line, Oregon 21-380 trimmer line will save you a budget yet not disappoint you in any manner.
Customers are reluctant to put this line into their shopping cart since it is sold at a retail price of under $15. However, its working stability and efficiency save its name and make this Oregon line the best solution if you are out of cash.
The lines were made of Nylon copolymer that is fortified with additives, so it lasts longer and breaks less. Round trimmer lines like Oregon will boost the cutting efficiency without drying out and quickly becoming defective.
From small gardening business to more prominent landscaping strategies, the Oregon trimmer line can be the perfect partner to support your needs. Last but not least, cleaning up will not waste your time since the lines were perfectly wrapped in a donut-shaped container for secure storage and fewer tangles.
Compared to premium trimmers or pre-wound spools, this trimmer line from Oregon can cover your every wish for gardening. Don’t let the low price make you underestimate its power. You will be surprised by how swiftly it goes through all of your bushes.
However, if you don’t set up this line with your weed eater correctly, tangles can be created frequently, and it can cost you a waste of time. In this case, try to seek manual instructions on how to install the line correctly to save your time and effort in the setting up step.
Pros
Best for value
High-quality line material
Easy to set up
Cons
Must read through the manual before handling the line
Verdict: Oregon 21-380 is a cheap option of the trimmer line category, however, its marvelous performance in trimming your brush or trees will not disappoint you.
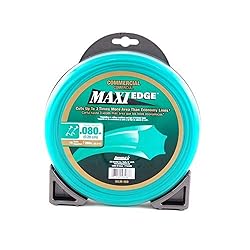
In case you doubt multi-edge-diameter trimmer line’s efficiency compared to round ones, think again after you purchase the Arnold Maxi-Edge.
This line arrives in a 6-point star shape that improves the cutting quality more fundamentally than a circular shape. The edges will provide extra exactness and efficiency for the line’s performance itself.
This commercial-grade trimmer line from Arnold is such a steal. Besides granting exceptional cutting behavior, its price is also extremely affordable. Anyone can have this line, put it into their weedeater, and enjoy the landscaping outcome without spending a fortune.
What’s more, the spool is exceptional with generally straight and bent-shaft string trimmers available. That’s why you can get it without regret regardless of what brand of weed eater you are utilizing.
For light-duty work, Arnold Maxi-Edge can maintain its usage for such a long time. For heavy-duty, several breaks can be identified in a short time. Make sure you adjust the level of working to an average level when using this trimmer line so as to expand its lifespan.
Pros
Multi-edge diameter for high cutting proficiency
Universal fit
Suitable for light-duty
Cons
Not ideal for heavy-duty
Verdict: With its strong multi-sided line characteristics make the product well-withstand with pressure, Arnold Maxi-Edge is the perfect company for your landscaping plan.
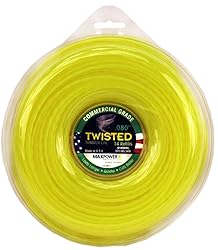
Different string trimmer lines usually suffer from outrage heating that results in melting at the bend and quickly breaking off. However, that is the thing you should no longer worry once you have had Maxpower 338813 in your landscaping plan.
Heating is indispensable when it comes to utilizing a weed eater in contact with your brushes or grasses. Thanks to the robust and heat-resistant support by the twisted formula, this stuff holds up exceptionally well under heating pressure. It also lasts long to the point that there can be no break off inside.
Not once did I have to stop to replace a broken line, just check for fraying at the end after significant use.
To be more convenient in use, it is also very accessible to install this line onto any weed eater. A wound-style range, it’s sturdy and capable of slicing through grass, weeds, and otherwise with little to no hesitance.
Pros
Best twisted diameter trimmer line
Cutting proficiency and exactness improved
Affordable
Cons
Breakable
Verdict: Twisted trimmer lines are ideal for heavy-duty landscaping. Being one of the most impressive twisted trimmer lines, Maxpower 338813 can certainly give you a hand.
Things to consider when purchasing a string trimmer line
Shape
Trimmer lines’ shapes are variable, and each type creates a significant difference in cutting proficiency and exactness. You can find these three types of trimmer lines on the market: round-shaped, multi-sided, and twisted.
The round trimmer line is perfect for at-home small gardening businesses.
A multi-sided trimmer line is ideal for medium-to-high-level jobs.
Serrated and twisted trimmer line is best for large, commercial properties with a lot of big, complex brushes.
Material
Depending on how big your project is, you can choose the material of your trimmer lines to have it best suit your needs without having to spend so much.
For lightweight projects like trimming your launch or cutting off some grasses, trimmer lines made from nylon or plastic will perform exceptionally.
Otherwise, big and bulky brushes or professional landscaping requires more sustainable material such as aluminum, fiber, or engineered polymers for their trimmer lines to work correctly.
Durability
The quicker your trimmer line separates, the more often you will need to supplant it. Progressively purchasing trimmer lines over and over will eventually cost you more than you think.
Make sure to have decent research before putting any kind of trimmer line into the shopping cart. Continually changing the trimmer line isn’t just expensive, yet irritating and poorly arranged.
Diameter
One of the most significant parts of the trimmer line that needs to be thoroughly analyzed before a purchase is its diameter.
A trimmer line’s width straightforwardly influences its capacity to slice through specific weeds. Light distances across commonly extend from 0.065 crawls to 0.080 inches. Medium distances across ordinarily reach from 0.085 to 0.105. Overwhelming breadths measure from 0.110 inches and past.
Size
If you are not sure .080 trimmer lines are the best options for you, there are more trimmer lines’ size to consider.
The final word
And that’s all the information we have covered on the best .080 trimmer line. If you are looking for an affordable yet effective solution to arrange your garden neatly, try a .080 trimmer line, and you won’t regret it for sure. This type of trimmer line is a universal fit that can be brought into any kind of weed eater and still functions like an ace.
Our most favorite .080 trimmer line is Cyclone CY080D1/2-12. This product from Cyclone represents every goodness you are looking at a high-quality, sustainable, yet accessible trimmer line for your weed eater.
Thank you for reading our article, and we will catch up with you soon. If you have any questions regarding trimmer lines, make sure to drop it down for us to give you the answer you are looking for.
If you have a large garden and want to clean up, the brush cutter will be a better option than a strimmer in this case. Why?
Because the best brush cutter for brambles has so many special features to cut through the thick weeds and over-high grass which are flourishing in your lovely garden.
But choosing a suitable object for your purpose is not simple. In order to solve your problem, please read our review below and we will ensure you can make the right buying decision.
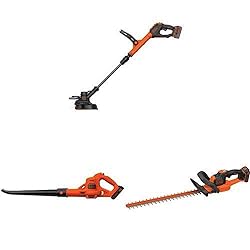
When asked about which one to pick when buying the best brush cutters for brambles, many people give the same answer that their cup of tea is BLACK+DECKER LSTE523 because of its amazing performance.
The most outstanding of this product is its power. The machine has a powerful 20V battery with the airspeed up to 130 MPH. This makes the device be able to do household work easily and effortlessly.
Besides, the design is another plus. With two included cutting knives, this machine can convert from trimmer to wheeled edger quickly. This machine is cordless, which gives our customers lots of freedom when using it.
The life battery of this product is doubled to the previous generations. (the current version 3.0 Ah battery with a 400mA charger to the previous version 1.5 Ah battery for 200mA charger). Therefore, if you want a long-life battery brush cutter to use, this is the model to get.
However, everything has its minus. This product is not an exception. Best performance equipment often comes with the highest price and this rule applies well on this product But, apart from this point, this is a good one for you to buy.
Pros
Special design with maximum performance
Stable and durable
Light ever like slight rain
Cons
High price to afford
Verdict
In a nutshell, apart from high price, this equipment owns several upsides that you deserve to have. With this, you will save more time and labor.
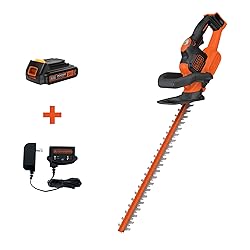
If lightweight equipment is your ultra-purpose, our recommended product for you is BLACK+DECKER LHT321FF.
The emphasis of this product is, of course, its lightweight. In our review, this is the lightest one. Its item weight is only 8.4 pounds and the shipping weight is only 8.5 pounds.
With this weight, you can use two hands without breaking your neck. For the weak and the old people, this is perfect for their physical strength.
Another worth-noticing feature is its amazing technical measurements. As the brand advised, this product has 22 inches dual blades to ensure less vibration while trimming.
And, this design can help you cut the bushes up to 3/4 inches diameter when comparing to other products. Its grips and low vibration can help you complete the jobs quickly.
Then, a powerful 20V MAX lithium Ion battery gives this product the best performances for you. With includes a great hedge trimmer, as advertised, this can do the trimming up to 3,000 sq.ft. in one charge.
And, the centre mode of this machine, POWERCUT system, allows you to cut the toughest hedges and shrubs by only pressing one button.
Nevertheless, remember one thing: this brush cutter will not work well in extreme weather: too hot or too cold. That’s not a good idea when you use it in snowstorms.
Apart from this point, you should feel confident buying this best brush cutter for brambles.
Pros
Powerful yet light trimmer
Pretty quiet
Cons
The position of safety guards can limit your vision
Verdict
By using this machine, you can feel comfortable to use. Notice that the extreme weather conditions will kill this equipment!
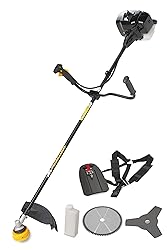
In this industry, Einhell is a big brand name in manufacturing household equipment. And, of course, their products are always highly appreciated by the most demanding customers.
For this product, the main selling point of the brush cutter is its design purpose.
This product is best for medium-duty jobs. Let us show you! First, this has a powerful engine, up to 52cc for use. With high-quality four-stroke engines inside, this device is a monster in long-lasting tasks outside.
Moreover, the long aluminum handles are maximized for users to control the scythe easily. The three-tooth blade and one twin pool are supported with the scythe. This combination makes customers feel comfortable when using.
The safety in using it is also considered. This machine has a smart quick-start system with user-friendly control mode which helps users use it easily even after a long time working.
The safeguards of this product, a small clutch in idle mode, are designed to prevent users from cutting themselves suddenly. And, this product can be assembled into small parts to be stored in the minimum space in a few seconds.
The only problem is it’s too heavy. It’s not suitable for old people. But if you can accept this above point, this will be a good choice for you.
Pros
Powerful and reliable
Comfortable use
Affordable price
Cons
Quite heavy and smoky when using
Verdict
This machine can be heavy for most people. But if you can accept this point, you can not miss this great brush cutter. Its strong power will definitely meet your needs.
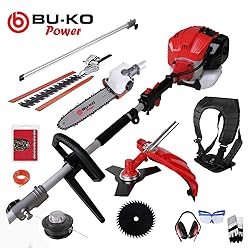
What we can expect from this fourth product? Well, if you are a big fan of the multifunctional device, this is the best brush cutter for brambles for your purpose. Why?
The first thing to introduce is its special design. As advertised, this product can be used for many kinds of use: Pruner Chainsaw, Strimmer, Hedge Trimmer, Thick Trimmer, Extension Pole, and Brush Cutter.
And, this product also has a full toolset for you to pick: toolkits, gloves, gas bottle, chain for chainsaw attachment, etc.
With one extension pole can extend to 3.4m, you can reach it to the furthest point than ever. Believe us! No device at this time can help you do such a thing like that.
The power is also fantastic. It has two-stroke oil 52cc engines with the rated power of 3 HP. This is quite stronger when compared to its rivals.
The design of this product, with many sharp blades and attachments, can help you do your gardening tasks easily. The handle switches are also associated with centrifugal clutches that increase the safety for users.
Moreover, the fuel tank is 1200 ml in capacity, so don’t worry about transferring anything when using. And, customer caring services are good. With a 12-Month Warranty policy and 7-day return, you can be comfortable to pick it into your houses.
The only disadvantage of this equipment is its weight. It is quite heavy for a person to use freely, so you may be in pain in the neck in long-time working.
Pros
Easy to be stored
Durable and high-quality
Best warranty service
Cons
Time-wasting in assembling small parts
Verdict
As a person loving multiple tasks, this is a perfect product for your requirements. However, you can be time-consuming because of various small parts.
Last but not least, McCulloch is a synonymous name in the high-quality household manufacturer. This machine, from this well-known branch, is ideal for medium-sized obstacles in your garden because of its unique design. Let’s discover!
First, the unique design is well-suited to normal use on medium-sized lawns. This machine is supplied by a powerful 1250 W two-stroke engine while the weight is only 7.9 kg. It also has a special trimmer head, which enables quick and precise thread adjustment.
Then, the doubled straps and two-handed handles of this device are created to make the household work be more comfortable. With prime functions and various centre modes, starting this machine can’t be simpler for users.
Another good point is its simple maintenance. The air filter cap can be removed easily if you don’t need to use it. The flexibility of the machine is also appreciated. The straps and handles can be adjusted for the arms and shoulders of customers.
So, you can feel safe for use. And, the price is quite affordable, so it’s a real consideration for you to have the best brush cutter for brambles at home.
Nonetheless, the blades’ heads are not changeable, and it is not easy to handle around the garden. Therefore, it will not be a good idea if you buy this as a present for your old parents.
But, except this point, in total, it’s a good choice for a person who loves gardening all-time.
Pros
Powerful and flexible
Durable and easy to use
Easy to operate the machine
Cons
Not easy to handle around the garden
Verdict
The blades heads of the machine are fixed. But if you can accept the disadvantage, this machine will help you to finish your gardening jobs quickly, you can be proud of having this.
For having the best brush cutter for brambles, there are so many criteria for a know-nothing person to notice. In our opinion, let’s consider these standards:
Weight
Power and speed
Flexibility
Safety issue
Let’s discuss each of these standards one by one now.
Weight
The weight of a device plays an important role in making the buying decision. Lighter devices, of course, will make the users feel comfortable without any pain sufferings.
But, the heavy ones will have more power and make you finish the jobs faster. Therefore, pick a suitable weight is a wise choice in this case.
Power and Speed
These two factors must be noticed in choosing a suitable one for all of you. The more power and speed your brush cutter has, the less time you need to finish your gardening jobs.
If there is lots of work to do, having a powerful and speedy machine is the best choice in the clearing process. But remember, the more power and speed you need, the more money you have to pay. That’s life!
Flexibility
This factor means what the real function of your machine is. Nowadays, many manufactures have added many functions into only one machine.
For example, the machine can be used in many kinds of equipment such as strimmer, hedge trimmer, pruner chainsaw, Brush Cutter, etc.
This makes the users have more options to change, so it saves so much time and labor for them to do the household work. Therefore, a multi-functional option is also a consideration for all of us when picking the best machine.
Safety Issue
Keep in mind, safety always comes first. According to “The safe use of brush cutters”, when the machine comes to cutting the brambles close to the fence, the best brush cutter is a safe alternative.
Nowadays, technology is improved rapidly, and the machine with sharp blades is also improved in many aspects.
They must be as light as possible. But, it must be durable and stand firmly on slide slopes. It also must not cause any harm to users in the working process, right?
Conclusion
After reading all, we hope you will have enough information for choosing the best brush cutter for brambles.
And, you know, if we have to pick a product to use, we will buy the first product BLACK+DECKER LSTE523 because it can meet all our standards for use in many kinds of work and environments.
We will feel so happy if our review can help you and your relatives in some ways in real life even a little bit.
Last but not least, please share this with the ones who need it.
The inflatable hammock. Some might have heard about it; some never have heard about an inflatable hammock. However, the moment that you have tried relaxing in one, you will never look back. This is the best thing to have when you are camping, or just looking for something to relax on, outside in your own backyard.
With this guide and information about the inflatable hammock, you will get to know the hammock that everyone is talking about. The hammock that everyone is looking for.
And, you will know how to purchase the best inflatable hammock, that is not only going to give you value for money but also going to be comfortable.
More Information to What an Inflatable Hammock is
You might not know this as an inflatable hammock, but you might know it as the inflatable lounger. This is basically the same thing, with just two different names.
This hammock doesn’t need to be tied between two trees or on a stand. You just make sure that you are getting air into the hammock and you have the best relaxed hammock for just chilling outside. It is easy to get the air into the hammock and to release the air again as well.
Making this great for parties, camping or for relaxing on or beside the pool. There are different types of inflatable hammocks available with different shapes and different qualities.
The Use of Inflatable Hammocks
Is this really practical to have an inflatable hammock, if the hammock isn’t lifted in the air and fastened between two trees? This is actually what we all know a hammock is.
However, if you don’t have two poles or trees for a normal hammock, then this is a great alternative so that you still can chill outside with something easy to set up and to store again.
There are many uses for the inflatable hammock. You can use it for laying on the swimming pool without getting wet. You can relax beside the pool with a cocktail and be comfortable during the summer holidays.
Or, you can even take some naps outside in the shades during hot summer days. Many are taking their inflatable hammocks with them on camping trips because it is compact and can fit into any small space.
Why You Need to Look for the Best Inflatable Hammock
It is important to make sure that you are looking for the best inflatable hammock. This is because there is a different type of hammocks that you can purchase that are similar to the inflatable hammocks. However, they aren’t all the same quality and don’t give the same support and enjoyment.
The best inflatable hammock is made from high-quality material that will not get damaged or a hole in it that won’t let the hammock inflate anymore. An inflatable hammock with a hole isn’t of any use anymore. This is why the quality of the hammock is so important.
Buying Guide of the Best Inflatable Hammock
The moment that you know the buying guide for the best inflatable hammock, you will not have to worry that you are buying something that isn’t going to give you value for money.
And, that your hammock won’t last throughout the first day. These are the things that you need to look for, in order to know that you are purchasing one of the best inflatable hammocks you can find.
The material of the hammock. You want to get a lightweight material, but one that is strong and durable. You don’t want the material to get a hole in, just because of the surface that you are laying the hammock on. This is something to remember. You aren’t going to hang the hammock in a tree, and low-quality material isn’t going to last very long.
Different shapes are available. You need to make sure that you know what type of shape you want. Do you want an inflatable hammock with back support so that you can read while you are laying on the hammock? Or, do you want to have a hammock that is just for relaxing where you are not going to get any back support?
Some of the Best Inflatable Hammocks That You Can Purchase
These are some of the best inflatable hammocks that you can purchase. That is giving you the best support, with great weight limits and that is durable.
YXwin Inflatable Lounger
Ludtom Inflatable Lounger
FRETREE Inflatable Lounger
Inflatable hammocks, or also known as inflatable loungers are really great for the summer days where you want to relax outside. There are many different types of hammocks, so you need to make sure that you know which ones you should consider and which ones aren’t recommended at all.
With this guide, you will get to know everything there is to know about the best inflatable hammocks so that you can get value for money and some great comfort while relaxing outside.
Hunting dogs are special. They are different, active and playful. And, therefore they need to get different food from other, normal dogs. You will only need some dog foods that are reviewed by the dog food for junkies.
This is something that you need to know when you are adopting a puppy or an adult hunting dog. No matter what type of hunting dog it is. Because they are active all the time, and unique from other dogs, their nutrients needs are different.
With this guide, you will get to know everything you need to know about the best dog food for hunting dogs. Making sure that you are feeding your dog correctly.
Why is the Right Dog Food Important for Hunting Dogs?
You need to know something. Hunting dogs are active, and they need a lot of energy to be as active as what they should be. Especially if they are hunting all the time, or on a regular basis.
If they don’t get the right food, their bodies will not have the right amount of energy needed to get through the day. The results will be that the dogs will start feeling tired, or will become ill.
This is why their food needs to include lots of energy-rich foods, and other supplements that ensure that they stay healthy. But, this doesn’t mean that you should not give your dog a lot of sugar. It is unhealthy and will cause health problems.
Things to Consider When Purchasing Dog Food
There are a couple of things to consider when purchasing dog food for your hunting dog. Things that will make sure that your dog is getting the right nutrients and the right food to stay active and healthy.
The dog food that you are giving them should be real meat dog food. This should be one of the main ingredients and not just a meat-by product. This isn’t healthy enough for them.
Also, no added preservatives should be added to the ingredients of their dog food. Be aware of fillers and grains. Not really a good idea for any hunting dog. This isn’t what they need in order to stay healthy.
Nutrients That Are Needed for a Hunting Dog
There are three basic nutrients that a hunting dog needs to get. This is the only way that you can know for sure that your dog is getting the right dog food. If there aren’t any of these three nutrients ingredients, then you should not purchase the dog food.
The higher the levels, the better it will be for the dog. These are the three nutrients that should always be included with the dog food for hunting dogs.
Calories. Because of their high energy levels, high-calorie levels are really important. The higher the calories, the better the dog food will be for your dog. Something essential to consider for sure if you want to have an active dog.
Fat. This is one of the best sources for energy in dogs. The higher the fat intake, the better it will be for the dogs. You might not buy food with fat intakes for yourself, but this is one thing that you need to look for when purchasing dog food for hunting dogs.
Carbs. Also, a known nutrient that is ensuring that fat is stored in the body for later use. Carbs are switching into energy when energy levels best dog food for hunting dogs: is running low. Making sure that you will never run out of energy, the body is using the carbs as energy.
Canned or Dry Dog Food?
This is a question that so many dog owners are asking. Should you give more canned or dry dog food? Which one is healthier for the dog.
There isn’t really a right or wrong answer. However, you should look at the weight of the dog. And, you need to make sure about the amount of money you have in your budget.
The only way to know if you are switching to canned food or not. In general, canned food doesn’t provide the dog with all the nutrients it needs to become strong and healthy.
Some of the Best Dog Food for Hunting Dogs
By knowing some of the best dog food for hunting dogs, you will not have a problem in finding the right dog food that is high in quality and great tasting, even for hunting dogs. These are some of the best dog food for hunting dogs that you can purchase basically anywhere.
Solid Gold High Protein Dry Dog Food
Purina Pro Plan SPORT Formula
Victor Purpose Performance, Dry Dog Food
To have a healthy dog, you will need to have the right type of dog food. It doesn’t really matter if this is dry or wet dog food. You want to make sure that the dog has all the energy in the world to make a success out of touring with the tourists.